Review: Cloud Flare (Why You Should Use It!)

If you’ve read my previous post about WP Engine, you would have followed my journey to improving my site performance for ReviewingThis.com. We began with a load time of 3.62 seconds for my homepage, and got the load time down to 2.11 seconds with the use of WP Engine and MaxCDN. But we weren’t done yet…
Cloud Flare has been very prominent in the performance and security industry of the web for the past few years. They’ve become the go to platform if you’re website is under attack (DDOS), or if you’re looking to improve your website performance. Allow me to use an image from Cloud Flare to better explain where they stand in all this:
 The first thing you need to understand is that Cloud Flare works on the DNS level. What does that mean? Well, when a visitor types in your domain name, a DNS lookup has to occur to find the IP address of your server. Once that information is found, the server is pinged, and the information on the server is then retrieved and displayed for the visitor.
Because Cloud Flare works on the DNS level, this is what it’s able to provide:
- Protection against malicious users: When a visitor visits your domain, before your server is even pinged, Cloud Flare first evaluates whether or not it is a “good” or “bad” visitor. You know all those bots or spam referrals hitting your website? Well Cloud Flare it set up to block those sort of visitors from actually accessing your server. This also helps immensely if your website is being DDOSed.
- Caching: Cloud Flare is able to cache your website on the DNS level. You know all those various plugins you use on your WordPress site to “cache” content? Well those plugins are working on the server level, not the DNS level. If you remember from my WP Engine post, I utilized a CDN that allows for all my images and media files to be delivered via the CDN instead of my server. This improves load speeds of the website, and takes the work load of my actual sever. Well, Cloud Flare has their own CDN that they use to serve your cached content. All the images and media files on your website are cached by Cloud Flare and shown to the visitor. This means, your own server does not have to deliver those same images or media files since that has already been handled by Cloud Flare. Obviously, with such a setup, your load time will drastically improve.
Is it difficult to integrate Cloud Flare with your domain and server? Nope, far from that – let’s get started:
Step 1:Head over to CloudFlare.com and click on “Sign Up” or you can click here. Fill out the information on screen and click on “Create Account”.
Step 2:After you create an account, you will be prompted to enter your website. Enter your website and wait for the DNS scanning to complete. Click “Continue” when the button appears.
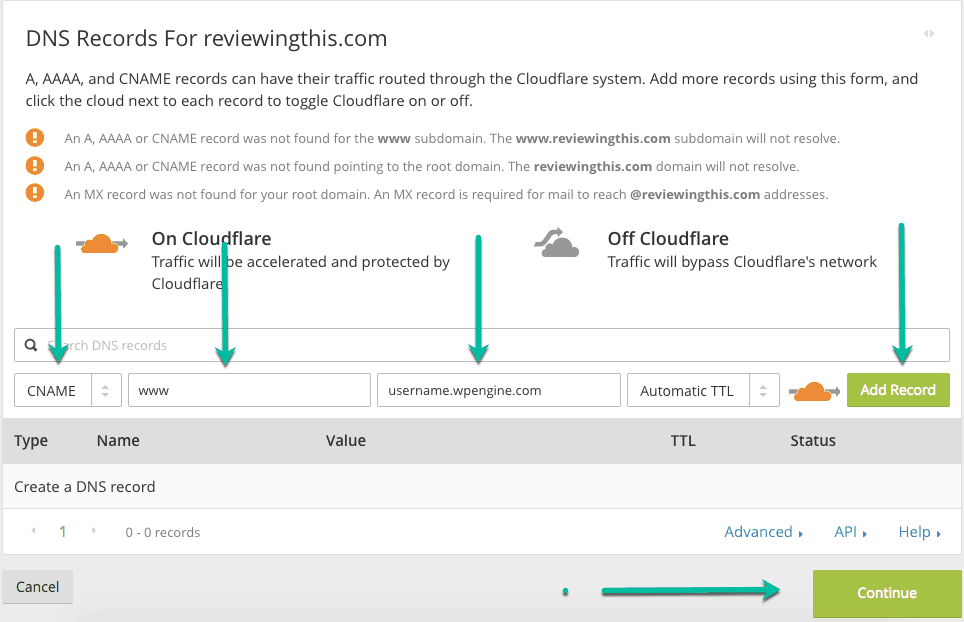
Step 3:You will now need to add a DNS record. Since I’m using WP Engine, I’ve put together a screenshot to show you what you would need to enter if you’re using WP Engine as well. Keep in mind that for where I entered “username.wpengine.com”, that username part needs to be your actual WP Engine username, the one that is available in your dashboard.
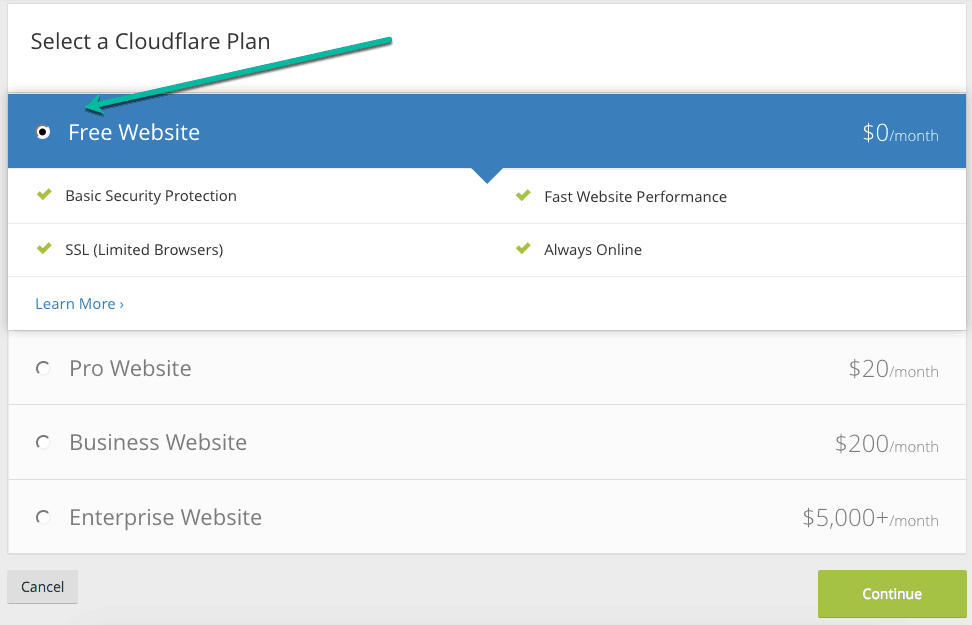
On the next page, you’ll have the option of choosing your plan. You will choose the “Free” plan and press “Continue”.
On the next page, you’ll be given two nameservers that look similar to this:
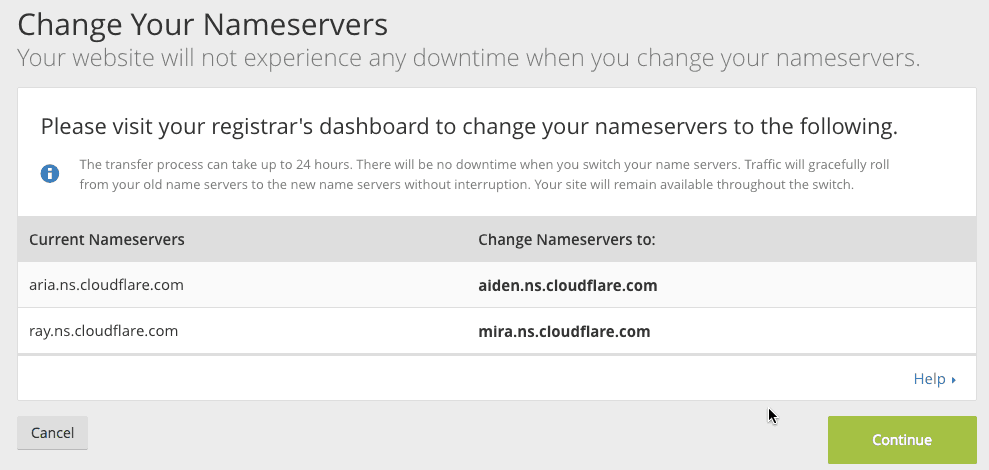
What you need to do now is log into your domain registrar, on add these two nameservers. If you are using WP Engine, then these two nameservers would be the only ones you have entered. If you’re using a different host, and you currently have your hosting’s nameservers in the fields, then you must enter these two as the primary. So these two would be NS1 and NS2, and the other nameservers from your host would be NS3, NS4.
You’re done. That is all it took to enable Cloud Flare on your domain.
Let’s get into the optimal settings that I’ve found that work great for me.

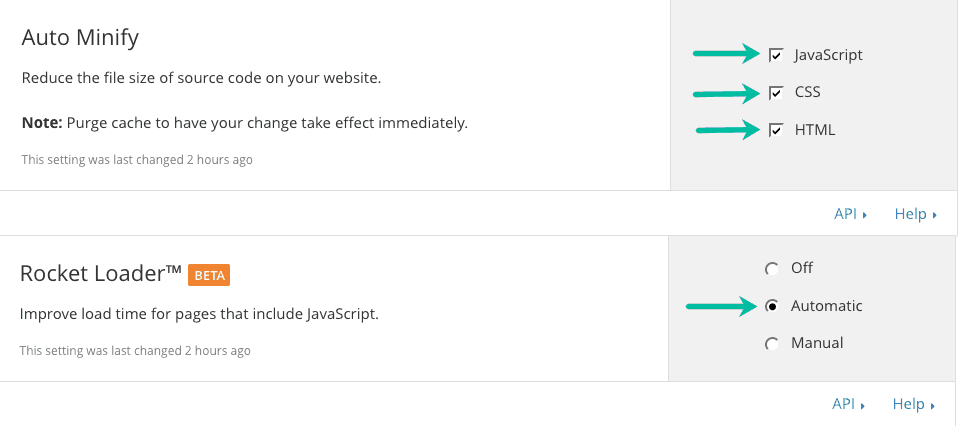
Under “Speed”, do the following:
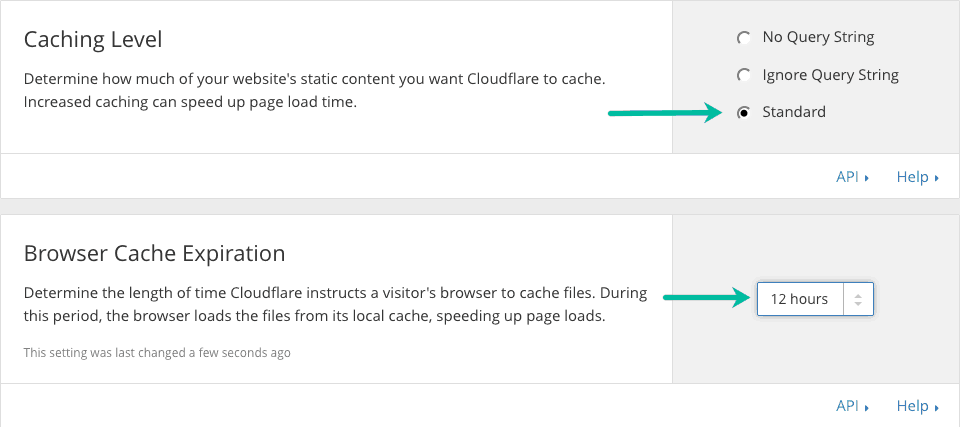
Under “Caching”, make sure you have the following settings:
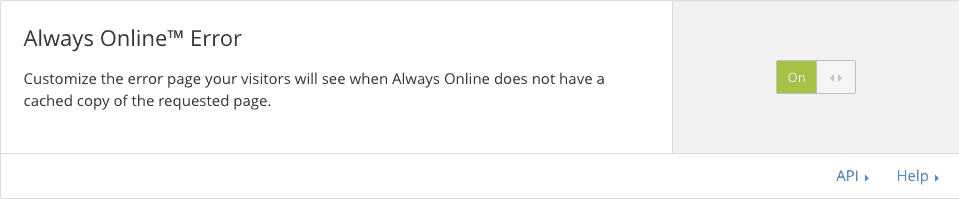
“Always Online” is a very interesting feature, the way it works is that if your server is offline, Cloud Flare will show a cached version of your website to the visitor. Which is awesome! Do keep in mind that Cloud Flare will only enable this for your most popular pages.
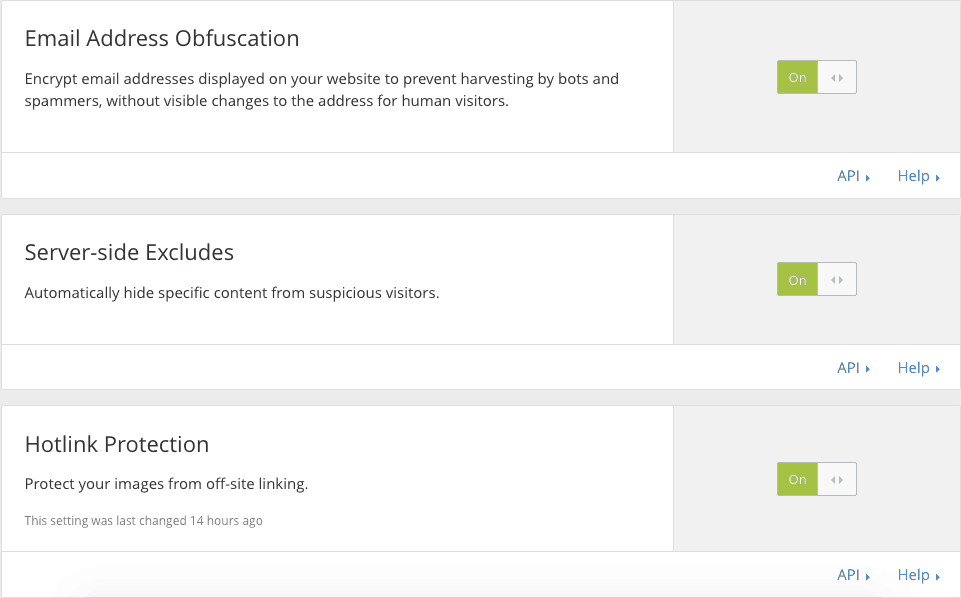
Under “Scrape Shield”, make sure the following settings are enabled:
Lastly, another very important page is “Page Rules”. In the free plan, you are only allowed to add three page with separate rules. You simply enter the exact URL, and then you can apply specific rules to that page. What can we apply to speed up performance on specific pages? Well take a look at this:
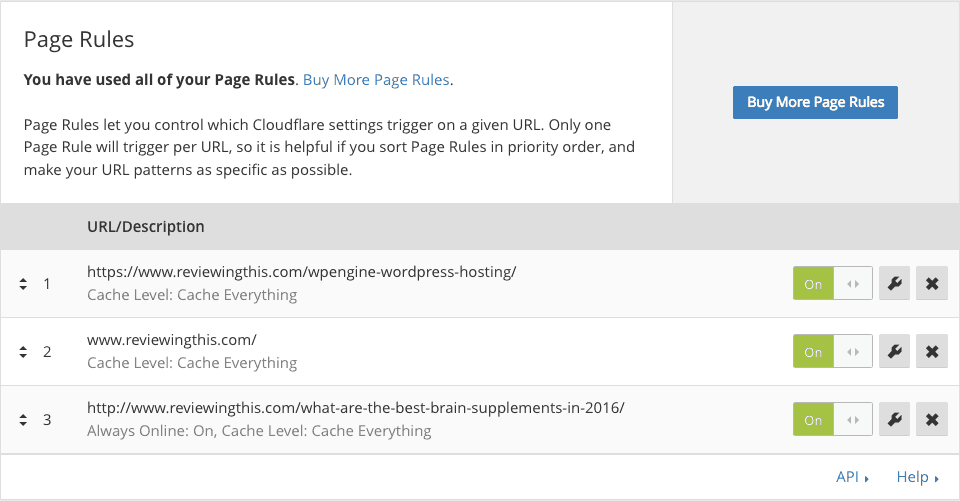
Notice how I added the rule “Cache Level: Cache Everything”? Well remember how at the beginning of this post I mentioned that Cloud Flare will cache all the images and media files on your site automatically? Well, if you use that rule on a specific page, then Cloud Flare will cache the whole website, HTML included. If you don’t set up this rule, then your server will still be pinged to retrieve the HTML on the page, but with this rule created, that doesn’t need to happen. Also notice how for my 3rd page, I’ve also enabled “Always Online”. Which is basically telling Cloud Flare, “Hey, make sure a cached version of this page is shown if my server is ever down.”
You obviously want to utilize these page rules on your most important pages, especially on the free plan. You’re only given three pages, so use them wisely.
So how fast is my website now that I have Cloud Flare enabled? Keep in mind that my page load was 2.11 before enabling Cloud Flare, so lets check it now:
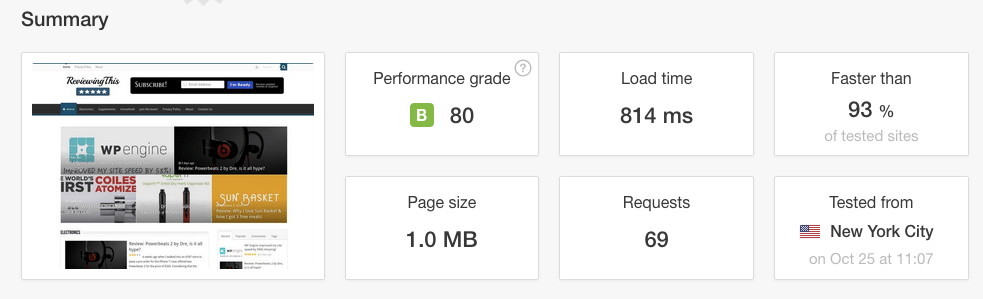
Yep, you’re reading that right. With Cloud Flare enabled, and using the settings I provided above, I was able to get my load time down under 1 second! That is officially nuts.
I know some of you may say that I don’t that much content on the homepage except for images, what if the page was much larger. Good point, so I decided to run a speed test on my WP Engine review post. That post consists of over 2,000 words, and over a dozen images. How did that page do in a speed test?
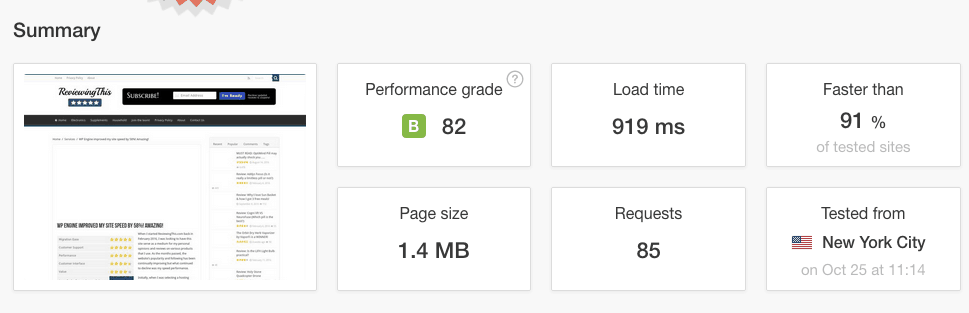
Still under 1 second…
If that’s not impressive, then I’m not sure what it is.
Let’s make a recap. Last weekend this website had a page load speed that was above 3.5 seconds. Today, and as of this post, the website loads in under 1 second. If you’re someone looking to improve your site performance, then just follow exactly what I did. Make sure you head over to my WP Engine review post to figure out how migration to them works, and then use the current post on Cloud Flare to help you finalize the process.
In additional, if you want a 20% off coupon for WP Engine, then click here.